Bread-making can be a time-consuming process.
It can also be complicated, especially for newbies. Since a wide range of steps are necessary to achieve the best rise in your dough, how can you simplify the process? Can it be streamlined?
Thankfully, a bread proofing box fits the bill!
A proofing box is a container that helps your dough rise. It keeps the temperature constant so that your rising time is faster and more effective.
In this guide, we’ll cover exactly how this useful tool accomplishes the task, how proofing boxes can speed the process along, and how to construct your very own bread proofing box.
Let’s dive in!
What is Proofing?
Proofing is a step in the bread-making process by which bread is allowed to rise. In the baking world, there are two things the word ‘proofing’ may refer to.
The first type of ‘proofing’ refers to the second rise of bread. This occurs after bread has been divided, rounded, benched. The bread is left to rise, often on the pan that it is meant to be baked in.
The second type of proofing refers to the step that occurs before any bread-making has occurred. Here, yeast is added to water (sometimes along with sugar) to check if the yeast is still active.
We’ll be talking about proofing in terms of fermentation.
Proofing or Fermentation
The word ferment comes from the Latin word fervere, which means to boil. Humans have been making leavened bread for decades.
The most popular theory is that our first attempts involved leaving the dough out in the open; eventually, it was fermented by yeast in the environment, bringing forth the first leavened bread.
Fermentation is the process in which an organism converts a carbohydrate (like starch, or sugar) into an alcohol or acid. This process creates heat as a byproduct.
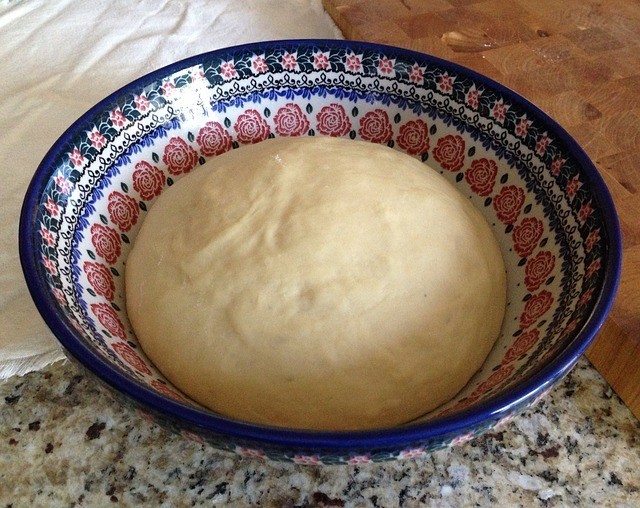
In the case of bread-making, yeast converts sugar in the dough and creates carbon dioxide (causing heat). This carbon dioxide fills up the inside of the dough, making it twice its original size.
Other than carbon dioxide, the yeast also creates other compounds; this gives the bread its unique taste and texture. Those who know the different types of bread dough can easily differentiate bread made with yeast from bread made without yeast, simply by observing the smell, taste, and texture.
There are three stages of fermentation:
- Pre-Ferment: An optional step, pre-fermentation is the step by which a mixture is allowed to ferment before adding it to a bread mix. Common examples of pre-fermentation include the making of sourdough, polish, and biga.
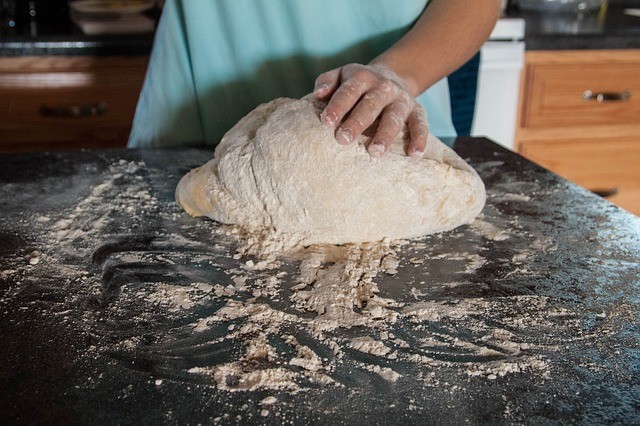
- First Fermentation: The first fermentation happens while the bread is being kneaded, including any rest time that the bread may require. In some artisan loaves of bread, this can take as long as eight hours; for no-time breads, this can be as short as 15 minutes. In most recipes, this stage is referred to as the ‘first rise.’
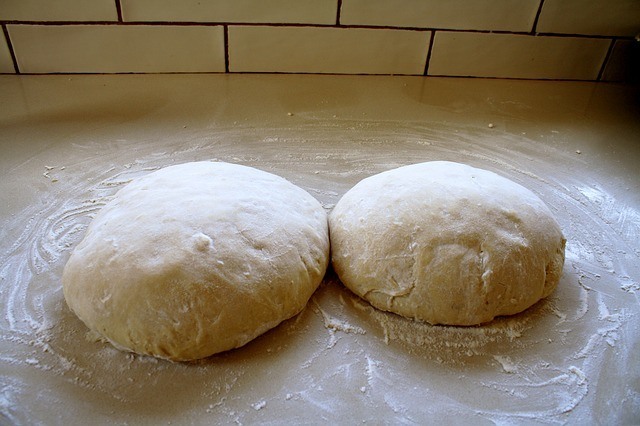
- Second Fermentation: The second fermentation begins when the dough has been punched down (the carbon dioxide has been expelled from the bread) and shaped. The dough will then rise in the shape it’s meant to be baked in. With most recipes, this stage is referred to as the ‘second rise,’ or ‘proofing.’
What is a Dough Proofer?
For those who desire more control over the proofing conditions, there is specialized equipment available on the market.
A dough proofer (also called a proofing box, proofing oven, proofing cabinet, or dough proofing box) is a warming chamber that can increase the activity of the yeast.
This means that your proofing will be faster, higher, and of better quality. Dough proofers typically keep the air inside the cabinet between 80 and 90 degrees Fahrenheit, and at 75% humidity.
A dough proofer is typically used for the second rise or second fermentation, but it can also be used for the first rise of the dough.
A great example is the Brod & Taylor Folding Proofer:

This is a pricy but elegant dough proofer for those who need exact control over the rising process.
If you don’t like the idea of making your own proofing box, you can simply buy one off the shelf with numerous additional capabilities (e.g. exact climate control).
Why Do You Need a Proofing Box?
Proofing may be a confusing science. There are numerous factors that affect the proofing process, like temperature, humidity, and the quality of the dough ingredients.
First-time bakers may find themselves with flattened doughs, or loaves of bread that failed to rise because of inadequate conditions. Having this failure occur in bread you worked on for hours is very disheartening.
Even bakers who already have a solid grasp of the proofing process can benefit from using a proofing box. A proofing box will ensure that the temperature and humidity your bread is exposed to is kept at a consistent level.
This consistent temperature can ensure that your bread develops the best texture, taste, and quality – which only a good proofing process can give.
How to Make a DIY Proofing Box
Many professional bakers use a proofing box to speed up their baking and improve the quality of their bread.
However, home bakers don’t have to spend money on a professional-grade proofing box. With a few things you may already have lying around the house, you can easily create your own proofing box!
This is a general approach to developing your own proofing box. As such, feel free to change the specifications, especially the container size and bulb wattage, to accommodate the conditions you need.
Materials
When building a proofing box, you will need three main items:
- A Container
Your container can be made of anything that will retain heat. For those who enjoy woodworking, you can easily create a box that will contain all your bread, including shelves if you want to proof multiple dough batches at once. Just ensure that your container doesn’t have any holes and can properly retain heat.
For those who want a simpler build, you can use an overturned plastic storage. This build has the advantage of being cheap and easy to put away. However, this may not be ideal if you are doing a great deal of baking.
For those who would like to have specific container dimensions, you can build your own box, such as the one found here. Simply cut a box out of plywood, and connect the pieces together to build your box. Don’t be afraid to be creative with your containers; you can re-purpose old tubs and crates for your proofing box.
When it comes to proofing boxes, smaller is better; it will be easier to control the temperature in a smaller space. If you need to proof a great deal of dough, all at once, consider building multiple boxes instead of one, larger box.
- A Light Source
A light will be the source of heat for your proofing box. Bakers will swear by light sources made for reptile aquariums. However, with the right container, you can get away with pretty much any type of light you have lying around.
Just make sure to test the bulb and see if it can heat up your container in the temperature that you require. If it doesn’t, you can easily switch out the bulb for one with higher wattage.
- Thermometer
You will need a thermometer to keep an eye on the temperature inside your proofing box. You won’t need it often, once you’ve determined that your proofing box can maintain a consistent temperature.
Optional Materials
Depending on the size and purpose of your proofing box, here are a few other items you may need:
Insulation
This is important for containers that are too big or those made of materials that cannot keep in the heat.
A good method of fixing this problem is by lining the inside of your container with bubble insulation, which can be easily found in office supply stores.
Fan
Especially for larger containers, you may need to find a way to circulate the air inside; this keeps the temperature consistent throughout the entire container.
You may also need to test out the temperature throughout all levels of your box before you can determine if a fan is necessary.
However, a good rule of thumb is the larger your container, the more likely you’ll need a fan to keep the temperature constant.
Thermostat
A thermostat attached to the bulb is a great way to automatically keep your proofing box’s temperature consistent.
You can attach your thermostat to your bulb, so it can automatically turn on and off, depending on the temperature inside the box.
However, if you don’t want to spend the money, you can manually handle the temperature of your box. You won’t need to take the temperature too often, once you have determined that your box can keep it consistent.
This video gives more of an explanation on dough proofing.
Assembling Your Proofing Box
Since this is a DIY approach, some trial and error may be necessary to determine if your proofing box is effective.
As such, don’t be surprised if disassembling, customizing, and reassemble parts becomes a routine activity – at first, anyhow.
- Prepare your container. Drill the holes to feed wires through, and add in spaces to outfit fans and light sources.
- Install the light fixture. The light fixture should be installed at the top of the box.
- Install the thermostat.
- Let the light run for about an hour to heat up the box. You should check the temperature at intervals (every ten minutes or so) to determine how fast your proofing box can pre-heat.
- If your box isn’t reaching the necessary temperature, change your bulb into a higher wattage.
- Continue checking the temperature of your box at intervals. Make sure to check all areas of your box, should you have a larger proofing box.
- If you have inconsistent temperatures throughout the box, install a fan.
- If your box is prone to overheating, add holes at the top to allow excess heat to escape.
How to Proof Bread In Your Oven
You likely have the ideal proofing box in your kitchen already; that’s right, your oven can be easily used as a proofing box! This is a great solution for bakers who aren’t developing too many batches at the same time.
This method works because the boiling water creates the necessary humidity, while the oven itself is already well-insulated. As such, heat and humidity are kept constant throughout the process.
Here’s how to get started:
Materials
- 3 cups of water.
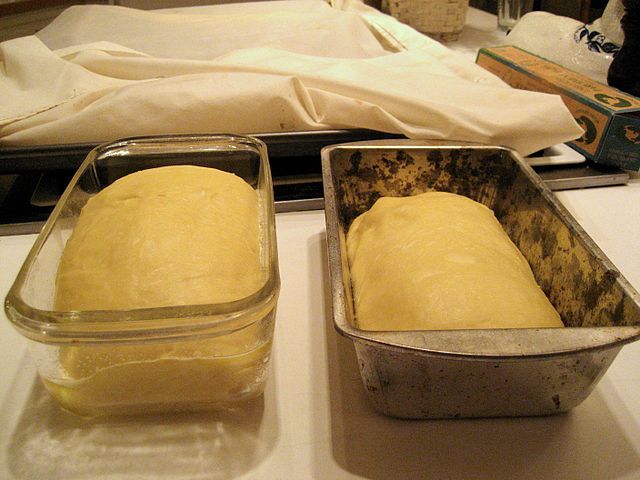
- Glass or metal baking dish, at least 8 to 9 inches in size.
- Oven.
- Thermometer.
Method
- Heat three cups of water to a neat boil – specifically, 200 degrees Fahrenheit.
- While the water is boiling, set up the oven. Place a baking rack in the middle; this will be where we will put our dough. Then, add another baking rack at the bottom, where we will put our baking dish.
- Cover your dough loosely with plastic wrap or a towel. Place the dough that you want to proof on the middle rack, in the center of the oven.
- Place the baking dish on the bottom rack of the oven. Carefully pour the water inside the pan.
- Close the oven door and leave the bread to rise as needed.
- Regularly check the temperature inside the oven, confirming that it’s even.
This method is effective for about an hour. Check the oven temperature after one hour, and if it is below 75 degrees Fahrenheit, simply change the water.
This video gives more information on using a proofing oven.
Tips for Maintaining Proof Box Conditions
When constructed well, your proof box will keep the temperature fairly consistent throughout the proofing process. However, there are ways to help the process along, such as:
- Refrain from opening the oven door too much. It’s tempting, but this can hinder your progress.
- Use plastic wrap, instead of a towel, so that you can view the dough’s size from the outside.
- Don’t proof different types of doughs at the same time. This will ensure that your doughs are each obtaining their necessary temperature and proof time, without interference.
Final Thoughts on DIY Bread Proofing Boxes
Proofing dough can be time-consuming, and sometimes even complicated. Thankfully, it’s easy to create a proofing box with a few simple materials – or your own oven!
Hopefully, this has helped you create faster and better bread. Happy baking!
What’s your favorite proofing box?