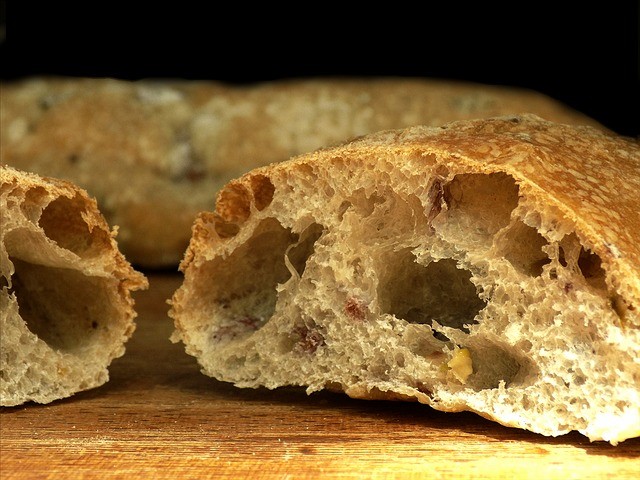
Sourdough is a variety of bread formed through the application of a specially fermented flour and water mixture into normal bread components. This results in a dense loaf with a more sour flavor and crumbly texture.
This article will teach you a way to use the sourdough in a rather strange variety of bread: ciabatta.

Contents
What is Ciabatta Bread?
Ciabatta, literally translating to the Italian word for “slipper” due to its shape, is a more flat loafed bread made with flour, water, yeast, salt, and olive oil, that is extremely airy and light.
This variety of bread is fairly new, first introduced in 1982 by Francesco Faveron, a baker from Verona.
It has multiple variations depending on the location, with some having a crispier crust and more porous texture, and others being softer to the touch and seasoned with marjoram.
There’s also ciabatta integrale, which contains wholemeal, and ciabatta al latte, which contains milk in the dough.
This dough came about as baguettes were being imported from France, putting the bakeries of Italy in danger. Through careful trial and error, eventually, the recipe for the ciabatta came to be.
Generally, while there are multiple variations, they will consist of a soft, wet dough made from a high gluten flour, such as bread flour or all-purpose.
Making Sourdough Ciabatta
Now that you understand what ciabatta is, it’s time to begin constructing your very own.
Ingredients
In order to do so, you will need the following ingredients:
- 4 ¼ cups of bread flour.
- 4 ½ cups of sourdough starter.
- 3 tablespoons of water.
- 2 tablespoons of olive oil.
- 2 ½ teaspoons of salt
- An extra ⅓ cup of water to add after mixing the dough for 10 minutes.
Note: The higher amount of sourdough will give your bread the ideal texture, but it will also result in the bread taking on a greater sour flavor.
That’s certainly not unpleasant, but it could be more than anticipated.

Directions
Now that you have all the ingredients together, it is time to begin baking.
First things first, you will need your starter. It should be prepped and ready at least two days in advance, given time to ferment properly.
Whether you choose to make the starter yourself or buy it from a store, both options are fine.
Once it’s ready, you will have two options: hand mixing and stand mixing. The hand mixing will be more strenuous, but is also significantly cheaper and won’t require expensive equipment.
Hand Mixing Instructions:
- Start by mixing together all of the ingredients, except for the extra ⅓ cup of water.
- Begin mixing, steadily building up speed and, by extension, gluten – for 8 to 10 minutes or until the dough is smooth and marginally sticky.
- Very gradually mix in the remaining water until it is fully incorporated.
Stand Mixing Instructions
- Should you prefer to use a stand mixer, add all the ingredients, including the water, into the mixing bowl and use the paddle attachment on medium speed for five minutes. Next, once all the dough is incorporated, exchange the paddle for the dough hook and continue mixing on medium speed for another two minutes – or until the dough turns smooth and marginally sticky.
After Mixing:
- Cover and allow the dough to rest for 30 minutes.
- Once it has begun to rise, then stretch, fold, and lift the dough with a scraper and fold it in on itself, being careful not to over-work it or risk losing the air inside.
- Cover with a loose, breathable cloth and allow the dough to rest for another 30 minutes.
- Stretch and fold the dough once again and place into a lightly oiled bowl, making sure to keep it off the sides. Then, cover and allow it to rest once more – this time for one hour.
- Stretch and fold a third time, wetting your fingertips with water and gently pulling the dough off the bowl, towards the center. Once this is done, gently lift the dough up and down, allowing it to drip slightly before dropping it back into the bowl. Avoid ripping the dough if possible.
- Cover it and allow the dough to ferment until it is puffy and doubled in size.
- Heavily flour a countertop and begin pulling the dough into a rectangular shape.
- Cut the dough into three square pieces before letting the dough proof for one hour.
- Preheat the oven to 500 degrees Fahrenheit.
- Once proofing and preheating is complete, place the loaves on a baking sheet and bake for 10 minutes, before baking for another 8 to 10 minutes at 450 degrees Fahrenheit.
- Finally, allow it to cool on a rack for at least one hour before slicing.

Conclusion
At first glance, sourdough loaves can seem daunting, but with proper work and instruction, anyone can successfully make their own, so bake and enjoy!
Have you tried making sourdough ciabatta?
