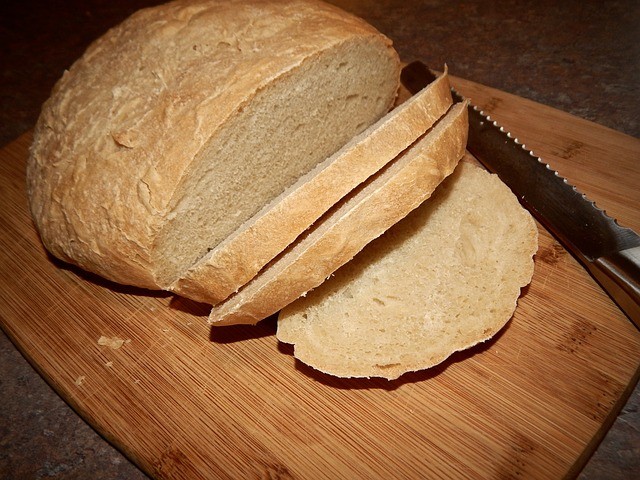
If you haven’t tried making bread in the past, it may seem like a daunting venture.
Sure, fresh-made sourdough in the comfort of your kitchen sounds delicious, but do you have the expertise?

The truth is, with the right recipe, making your own sourdough is simple and fun. It doesn’t take much, but the main ingredient is to have a little patience.
Here we have an easy recipe that will serve as a great introduction, as well as a tasty treat you’ll be dying to make again.
Let’s dive in!
Contents
What Is Sourdough Starter
A starter is, essentially, a way to make your own yeast rather than buying it elsewhere. This gives you more control over how sour or mild your dough will be, as well as helps save money in the long run.
As an added bonus, you then get all the kudos of truly making bread from scratch.
It’s as simple as mixing flour and water, and letting it sit for a period of time.
You can work on the sourness of the starter by making a few changes to the type of flour you use and the amount of time it waits, but in essence, it’s a dead-simple process.
The Ingredients for Sourdough Starter
The Water
Avoid using tap water for your sourdough starter, since this gives it a bland taste and will also force the entire process to take longer.
Instead, use filtered, pure water. If you want to use bottled water, that will work as well.
Temperature also plays a role. If you are in a warm environment, cool water is preferred; if you are in a cooler climate, lukewarm water will work best.
The Flour
Unbleached, all-purpose flour will give you the most traditional taste and will likely be in your kitchen already.
Rye flour is also a fan favourite, as it provides a ‘fuller’ flavour, though we advise you to start with regular flour and experiment from there.
See more: using diastatic malt powder for bread starters

The Tools for Sourdough Starter
- A breathable fabric; this can be a clean hand towel or a coffee filter.
- A glass or plastic container large enough to hold 8 cups of your sourdough starter. Avoid metal containers.
- Mixing spoon. Wooden or plastic will do just fine.
- Measuring cups for your flour and your water.
Starting Up Your Sourdough Starter
Day One – Mix
We weren’t joking when we said this process would require a little patience. As yeast is organic and takes time to grow, it will take almost five days for your starter to become strong enough to be used as bread dough.
However, if all goes well, you’ll have a customized starter ready to be included in your bread made from scratch.
- At the start, mix one ½ cup of flour with one ½ cup of water in a clean glass or plastic container.
- Then mix them well.
- Place the container in an out-of-the-way place and allow it to sit at room temperature.
- Be sure you don’t seal the container, as the yeast needs to breath, but cover it with your towel or coffee filter to keep it safe.

Days Three to Four – Bubbles!
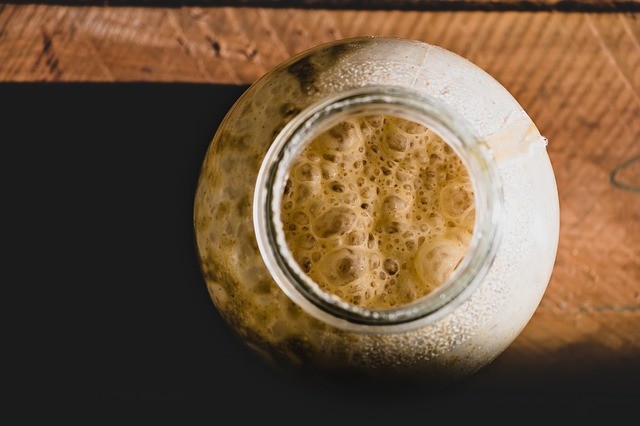
At this point, uncover your starter and inspect the contents. Check for any bubbles that may have formed.
If you do see them, add an additional ½ cup of flour to the mix along with ½ of water.
Stir the mixture again to blend it well, and place it back in a room temperature area where it won’t be bothered or spilled.
Signs of Trouble: If nothing has happened, and there is no indication of a reaction inside the container, then something has gone wrong and it’s time to start from scratch.
No shame in that! It happens to the best of us. Discard the contents, and resume Day One’s instructions.
Keep in mind that room temperature plays a part in the cultivation, so you may want to move your container to a different area.
Days Five and Six – Consistency, Size, and Smell
At this point, if all has gone well, your starter should have expanded and will be much thicker in consistency.
It should also have a distinct sour smell to it, indicating it’s progressed!
Add some flour and water, again in equal parts, and you will have about 3 ½ cups to be used for your dough, or to give to others to start up their own baked goods.
Signs of Trouble: If there is a layer of liquid at the top of the starter, and it is not bubbly or foamy, it means there was too much water used.
Carefully pour the excess water out and allow it to sit an additional day. After a day of additional waiting, you will notice that the sourdough starter has expanded well enough and has become foamy.
With these simple steps, congratulations, you’re ready to begin your bread dough!
Here’s a video showing another recipe you can make with sourdough starter.
Do you have other methods on how to make a sourdough starter?
