There’s nothing better than the smell of freshly made bread. If you want to try out a bread roll that’s a little sweeter than your typical dinner variety, why not experiment with a Filipino pandesal?
This nationally-loved bread tastes similar to a standard brioche, and can be served alone or with tasty accoutrements.
Contents
What is Pandesal?
Bread is a meal staple in nearly every nation across the world (except when a national dish is rice).
Italian ciabatta, French baguettes, and Irish soda bread all have a place in their citizens’ hearts, as well as on international dinner tables. In this, the Filipino pandesal is no different.
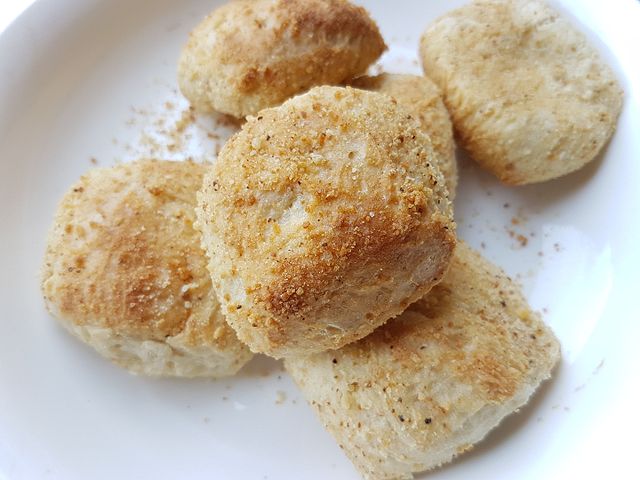
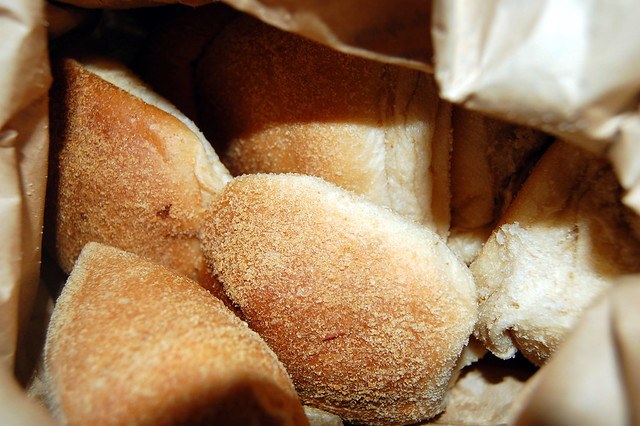
Pandesal is a light, fluffy bread roll – akin to the ones you’d see in roadhouse restaurants or in bags at the supermarket.
However, pandesal is less of a pre-dinner treat and more of an all-day snack. Pandesal is usually eaten for breakfast or to tide you over in between meals, though it can be served with dates and butter as part of an evening dinner.
The History and Origin of Pandesal
Pandesal and the making of this Filipino bread have as rich a history as the nation itself. However, pandesal is, in fact, not a dish native to the island country.
Instead, pandesal arrived in the Philippines with the Portuguese in the early 1500s. Prior to this, the Filipino diet relied on rice to serve as its grain, rather than any Western wheat.
However, the arriving Portuguese and the colonizers who came after them felt the need to introduce bread to the local ecosystem. This need arose – or so it’s said – out of the colonizers’ affiliation with the Catholic Church.
Catholics needed sacramental bread in order to take communion. As colonizing and evangelism go hand in hand, they also needed this bread in order to convert most of the local populous over to a Western religion.
The first version of pandesal that circulated in the Philippines was closer to a cake than the bread you know and love today.
This early version of the bread didn’t make use of the rising agents now found in kitchens around the world. Without yeast, bakers making this original kind of pandesal had to rely on tuba, an alcoholic coconut toddy.
The Spanish, sometime in this early experimentation stage, were the ones to give pandesal its name. Broken down into parts – “pan,” “de,” and “sal,” – pandesal translates as bread of salt, or salt bread.
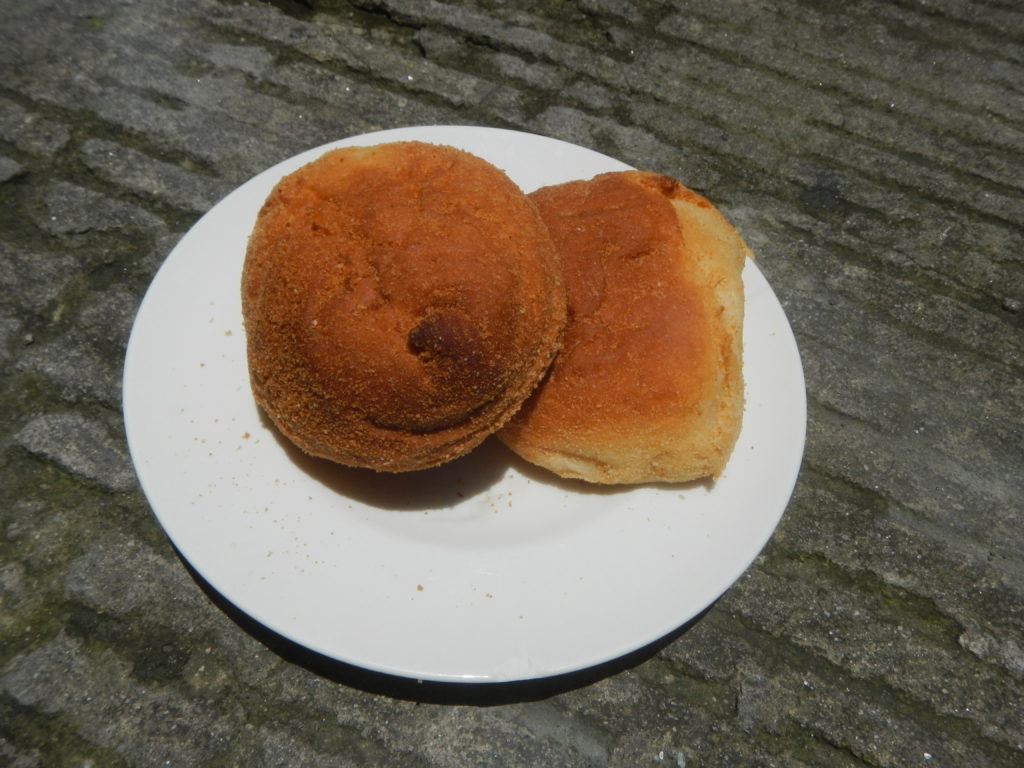
You’d expect, then, that pandesal would be a savory bread. Not so! It’s actually closer to brioche in flavor and is exceptionally sweet.

Nowadays, pandesal is made with yeast and goes through a rising process to ensure that it is fluffy and delicious when it hits your table.
The majority of bakeries in the Philippines sell pandesal as a staple food, and, with a recent uptick in food trucks and rolling stores, you can easily buy pandesal just about anywhere in the Philippines.
What to Serve with Pandesal
When you’re brainstorming which pairings to go with your pandesal, remember that the bread is exceptionally sweet on its own.
It can, as such, pair well with additions that lean towards savory in flavor or ingredients that don’t add to the overwhelming sweetness.
Coconut jam goes quite well with pandesal, as it’s tart flavor balances out some of the roll’s sweetness. If you’re looking for a similar bite, but don’t like coconut, you can try pandesal with mango jam or lemon curd.
If you hope to move away from the sweet and instead eat pandesal as a hearty, mid-day snack, the bread pairs well with finer cheeses and sweet sausage.
Making Pandesal
So, enough backstory on pandesal – how do you make this Filipino sweet bread?
Generally speaking, it can be made similarly to how you make any other sweet, yeast-filled bread. Bring the yeast to bloom at room temperature and combine the dry ingredients as you go.
There’s no need to shape the pandesal unless you really want to. Instead, you can easily roll your dough into balls and place them into the oven.
However, it is recommended that you roll or dip the dough in breadcrumbs before you let it rise for a second time. This adds to the texture of the pandesal and makes it distinct from other types of bread rolls.
Let’s get into the specifics. What do you need in order to make pandesal in your home kitchen?
Ingredients
Dry:
- 2 cups of bread flour.
- 2 cups of all-purpose flour.
- 1 teaspoon of sugar.
- 1 teaspoon of baking powder.
- 1 teaspoon of salt.
Wet:
- 1 package of rapid rise yeast (cannot be substituted).
- 1 ¼ cup of warm milk.
- 1 egg.
- 5 tablespoons of melted butter.
- 1 tablespoon of vegetable oil.
Once you’ve gathered all of your ingredients, you can start bringing your pandesal recipe together.
Method
Step 1: Yeast Blooming
In a small bowl to one side, mix together sugar, yeast, and all of the warm milk. Stir the mixture together until the sugar has dissolved. Let this mixture sit for ten minutes until it appears bubbly and thickened.
Note: Different brands of rapid rise yeast have different blooming instructions. If you want to play it safe, follow the blooming instructions on the back of your package. Once the yeast has been properly activated, you can add the sugar and milk to its bowl, so the live organisms can chew on this.
Whatever you do, do not add salt to your yeast before or while it is blooming. Salt kills yeast, and the premature combination of the two will ruin the texture of your pandesal.
Step 2: Dry Ingredients
In a large bowl, mix together the two varieties of flour, along with the salt and baking powder. Stir until well combined.
Step 3: Wet Ingredients
To the dry mixture, add the egg, butter, vegetable oil, and yeast mixture. Combine these ingredients with a spoon until a sticky dough forms.
At this point, you should be able to form the dough into a ball. Some of the dough will stick to your fingers, but do not add additional flour to the mixture.
Step 4: Kneading
Sprinkle flour on a flat surface. Remove your dough from its bowl and knead for eight minutes – or until the dough turns silky.
Alternatively, you can move the dough into the bowl of a stand mixture and knead it with a dough hook.
This process will create the dough’s silky texture much faster than kneading by hand. However, you should take great care to ensure the process goes slowly – or else risk overworking the dough.
Step 5: First Rise
Shape the dough into a large ball and place into a clean bowl.
Cover the bowl with a damp cloth and leave the dough to rise at room temperature for at least an hour.
Step 6: Shaping
After the dough has doubled in size, roll it onto a flat surface and delicately punch the air out of it.
While, as was mentioned, pandesal doesn’t have a particular shape, divide the dough into four parts and roll them into small balls.
Alternatively, you can shape the pandesal dough however you please. Take care to equally distribute the dough between the rolls, so you can have the most even bake and rise.
Step 7: Breading
Once you’ve shaped your dough as desired, roll the individual pandesal pieces in breadcrumbs.
Step 8: Second Rise
Place the breadcrumb-coated dough onto a baking sheet, leaving enough space between each bit of dough to allow for growth. Cover the dough with a damp towel and leave to prove for half an hour, checking on the dough at fifteen minutes’ time.
Step 9: Baking
While your dough is rising, preheat your oven to 375 degrees Fahrenheit.
Once your dough has finished the second prove, place your rolls in the oven for fifteen minutes, checking on them as necessary without opening the oven to let heat escape.
After fifteen minutes have passed, remove your pandesal rolls from the oven and let them cool for at least ten minutes. Serve alone or with your garnishes of choice.
This video shows an example of how to make pandesal.
Making Extra Fluffy Pandesal
Pandesal bread is already pretty fluffy by nature, as it has two different rising agents working to increase its gluten content.
If you want the secret to fluffy pandesal, however, you can find it in this alternative pandesal recipe.
- Add one extra egg to the recipe above, bringing the total egg count to two.
- Before adding them to your mixture, separate the egg yolks from the egg whites.
- In a separate bowl, whip the egg whites until they form stiff peaks.
- Then, gently mix the whipped egg whites into the pandesal mixture, along with the other wet ingredients – including the unaltered egg yolks. Be sure to maneuver the egg whites gently, or else you’ll knock all of the extra air out of your dough.
That’s it!
It’s worth noting that kneading this version of pandesal dough is easiest with a dough hook. You can set your mixture to a low speed and let the kneading process go on for a bit longer.
A gentle approach is a necessity in this process.
Pandesal Alternatives
There are also different versions of pandesal that you can make at home. It’s worth noting, however, that it’s almost impossible to make a gluten-free version of pandesal. This Filipino sweet bread does not gel with gluten-free diets.
However, you can make vegan pandesal! Check out the following recipe:
Ingredients
- 4 cups of bread flour, reserving one for kneading.
- A ½ cup of sugar.
- 3 tablespoons of vegetable shortening.
- 1 tablespoon of flaxseed meal.
- 1 tablespoon of baking powder.
- 1 teaspoon of salt.
- 1 tablespoon of breadcrumbs.
Method
Step 1: Yeast Blooming
Bloom your yeast in non-dairy milk, adding a ¼ teaspoon of sugar to the mixture, so the yeast has something to munch on.
Leave the mixture for ten minutes, or until it’s good and foamy.
Step 2: Combine the Ingredients
Because vegan pandesal doesn’t require the addition of eggs, you can combine all of the dry ingredients at once.
Mix together until well combined.

Step 3: Create the Dough
Add your yeast bloom to the dry ingredients mixture, along with the vegetable shortening.
Mix the dough with a spatula or spoon, until it is soft and sticky.
Step 4: Knead
Roll out your dough onto a lightly floured surface. Knead the dough until it becomes silky – roughly eight minutes by hand.
Alternatively, place your dough in a stand mixer and mix for five minutes with a dough hook.
Step 5: First Rise
Place your dough in a clean bowl and cover with a damp towel.
Leave at room temperature for about an hour, or until the dough has doubled in size.
Step 6: Shaping
After the dough has doubled in size, roll it onto a flat surface and delicately punch the air out of it.
While, as was mentioned, pandesal doesn’t have a particular shape, divide the dough into four parts and roll them into small balls.
Alternatively, you can shape the pandesal dough however you please. Take care to equally distribute the dough between the rolls for the most even bake and rise.
Step 7: Second Rise
Set your divided dough on a baking tray and cover with a damp towel. Let it rise for at least half an hour, or until the dough has once again doubled in size.
During this time, pre-heat your oven to 375 degrees Fahrenheit.
Step 8: Bake
Once risen, place your pandesal into the oven and leave it to bake for 10-12 minutes. Watch closely to make sure the bread rises evenly! When the rolls look golden brown, remove them from your oven and let them rest until cool.
Here’s a video showing an example of vegan pandesal bread.
As you can see, learning how to make pandesal is much the same as learning to make any other type of bread roll.
Once you’ve mastered the process, you can enjoy this sweet Filipino bread roll at any time to satisfy your carb-y cravings.
Have you tried Filipino pandesal?