Bread is one of the most delicious and beloved food staples in all the western world. Western foodies probably struggle to imagine a meal without some kind of warm bread at its side.
What would breakfast be without a good slice of toast or dinner without a nice, fluffy roll?
Japan, on the other hand, is not a country that is typically renowned for its bread, nor is the nation thought to have any sort of huge bread dishes. Most Japanese cuisine familiar to westerners tends to be rice, miso, or fish-based dishes.
However, as it turns out, there is a whole variety of delicious Japanese bread recipes any eager western foodie should give a try.
None of these dishes are more deserving than the simple yet tasty Japanese milk bread.
Let’s take a quick look at what this bread is, its surprisingly vast history, and even how to make your own loaves of delicious Japanese milk bread!
Contents
What Is Milk Bread?
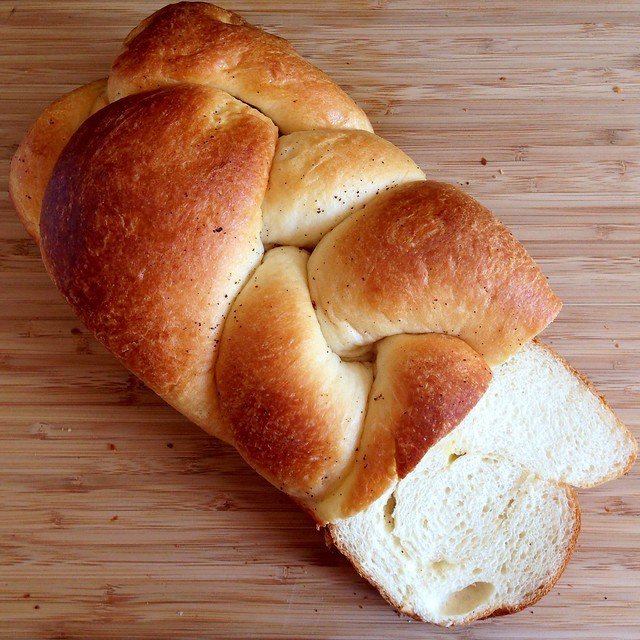
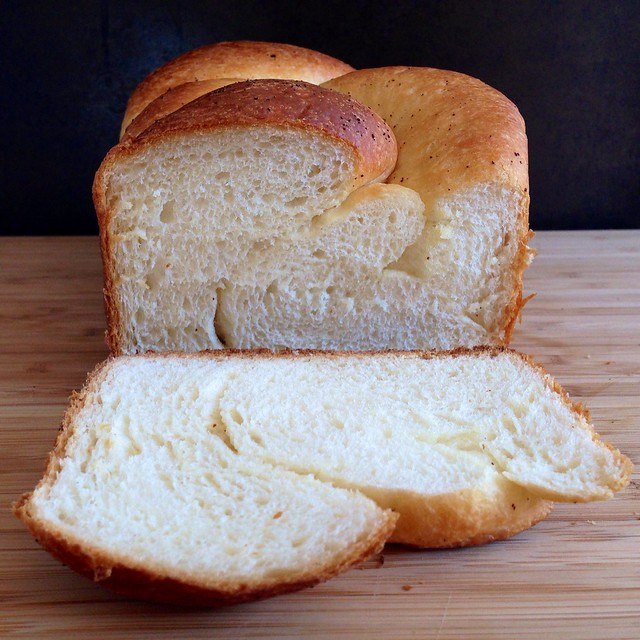
Japanese milk bread, also known as “shokupan” or “Hokkaido milk bread,” is a sweet, soft loaf that has become an everyday breakfast staple in Japan.
This bread is sold everywhere from supermarkets to convenience stores, and every good Japanese bakery makes fresh shokupan loaves every day, no matter how fancy the bakery. In fact, many Japanese people seem to prefer a piece of toast for breakfast over a bowl of rice nowadays.
If you are even a casual watcher of anime, you may have noticed that many of the high school student protagonists who are late for school often rush out of their homes with a slice of soft white bread in their mouths.
This somewhat random trope attests to this bread’s sheer popularity in Japan and further proves how much of a staple it’s become over time.
However, milk bread was not always so prolific in Japanese cuisine. So, where did it start?

The History of Japanese Milk Bread
Though Western-style bread was extremely popular in Japan as far back as the late 1800s, Japan had not begun to experiment with their own unique bread until around the 20th century.
This resulted from the Imperial Japanese government trying to establish both bread and milk as new staples in their citizens’ diets. Government officials believed these more western staples could offer more nutrition and viewed them as a modern update to the current diets.
Nonetheless, this strangely stringent effort failed to take much hold.
If anything came out of this forced introduction, it was the country’s desire for more fluffy, white bread. By the end of World War II, many even began to complain that the bread given to their children by occupying Americans soldiers wasn’t fine or white enough for their tastes.
Perhaps this frustration is what first drove them to create milk bread. Unfortunately, though, not much is actually known about where milk bread truly originated.
There has been some debate over whether it was first created in Hokkaido, due to the milk from this region’s sweet-dairy farms often being used in several milk bread recipes. Others speculated it came from Tokyo – or even China, since this bread’s baking techniques were lifted from its neighboring country.
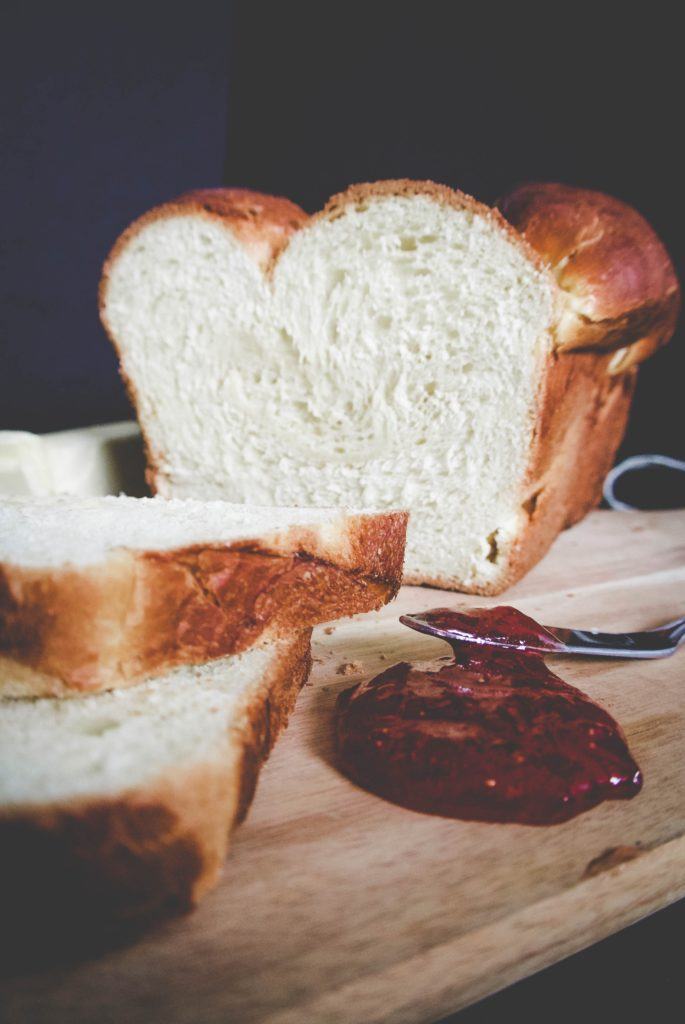
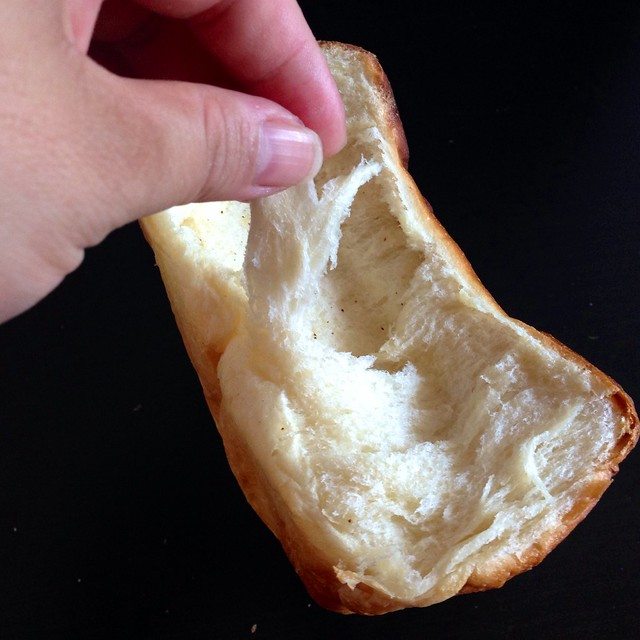
Regardless of this bread’s origin, however, one cannot deny that milk bread is one of the softest breads out there.
Interested in making a loaf for yourself or your family? Let’s take a look at a few Japanese milk bread recipes!
Japanese Milk Bread Recipe
This simple recipe is split into two parts—the starter and the actual dough itself. This is because Japanese milk bread is created with a technique called TangZhong, a Chinese baking method used to yield a pudding-like roux starter that will help create a softer loaf.
Keep in mind that precision is key with this recipe. It is advised that you use a scale to accurately measure out your ingredients.
If you still want to measure out by volume, just make sure you spoon the flour into the measuring cups and level off all ingredients without packing them in.
If you want a taller loaf with a crispy crust, you should use pain de mie pans. However, regular loaf pans will work just fine if you want milk bread with a soft texture.
Hokkaido Milk
If you have the opportunity to do so, try to use whole milk from Hokkaido.
This milk will lend your milk bread a sweeter, more authentic regional flavor than using other types of whole milk would.
- Yields: 9 x 5-inch loaf.
- Preparation Time: Approximately three hours for the rising and cooling of the dough.
- Baking Time: 1 1/2 hours.
Starter Ingredients
- 1/3 cup of bread flour.
- 1/2 cup of whole milk.
- 1/2 cup of water.
Starter Recipe
- Whisk all the starter ingredients together in a medium-sized pot on medium heat for about five minutes. Make sure you stir the bottom edges of the pot, so as to prevent any burned clumps from forming.
- Once the mixture has become the consistency of mashed potatoes, remove from the stove and transfer it to a bowl. Cover this bowl with plastic wrap. The wrap can lay directly on top of the mixture, if you want.
- Allow this roux mixture to cool to room temperature.
Milk Bread Ingredients
- 2 1/2 cups of bread flour (plus extra for sprinkling onto a clean surface).
- 1/4 cup of granulated sugar.
- 2 1/4 teaspoons of active dry yeast.
- 1 tablespoon of nonfat dry milk powder.
- 1 teaspoon of fine sea salt.
- Your cooled starter mixture.
- 1 large egg.
- 1/2 cup of room temperature whole milk.
- 1/4 cup of softened unsalted butter.
- Heavy cream for brushing.
Milk Bread Recipe
- Whisk the bread flour, granulated sugar, active dry yeast, dry milk powder, and fine sea salt together in a bowl under a stand mixer.
- Attach a dough hook to the mixer. Add in 1/2 cup of your cooled starter mixture, the egg, and your whole milk – then knead on a low setting for five minutes. Make sure to continuously scrape the bowl to ensure you are mixing everything in thoroughly.
- Add your softened unsalted butter and knead on a low setting for another five minutes, so that the butter is well integrated into the dough.
- Increase mixer speed to a medium setting and knead for another five minutes, until the dough is smooth and able to pull away easily from the bowl.
- Transfer your dough to a lightly greased bowl and cover it with plastic wrap. Let the dough rest for about one hour – or until the dough has doubled in volume.
- Line your 9 x 5-inch loaf pan with greased parchment paper and set it aside.
- Take your dough out and put it onto a lightly floured surface. Cut this dough into four equal parts and roll each part into a ball.
- You must then flatten or roll out each dough ball to a length of about 9 x 5-inches wide. Cover the other dough balls with plastic wrap to prevent them from drying out or forming a skin as you work.
- Fold each side of the rolled-out dough balls by one-inch, and then roll them into logs – starting from the end that is the closest to you.
- Place each log seam-side down in your loaf pan and cover the whole thing in plastic wrap.
- Let these dough logs sit for about 30 to 45 minutes – or until the dough has doubled in volume.
- Lightly brush the top of the dough logs with your heavy cream.
- Bake at 350 degrees Fahrenheit for 35 to 40 minutes – or until the top of the milk bread is golden brown, with an internal temperature of at least 190 degrees Fahrenheit.
- Let your bread cool in the pan for five minutes. Flip the bread out of the pan, onto a wire rack, and then let cool to room temperature.
- Slice it up and enjoy!
This video shows an example of how to make Japanese milk bread.
Can You Make Japanese Milk Bread in a Bread Maker?
You can easily use a bread making machine instead of a stand mixer if you are more comfortable with that!
Simply perform the above steps (as well as the steps for the gluten-free Japanese milk bread recipe down below) that call for a stand mixer with your bread maker instead.
How to Make Gluten-Free Japanese Milk Bread
Of course, the above Japanese milk bread recipe isn’t exactly designed for those with severe gluten allergies in mind.
Luckily, there are plenty of delicious gluten-free milk bread recipes available. Let’s check this one out.
Gluten-Free Starter Ingredients
- 3 tablespoons of all-purpose, gluten-free flour.
- 1/2 cup water.
Gluten-Free Starter Recipe
- Whisk all the ingredients in a small saucepan, and then cook over medium-high heat. Make sure you whisk the starter constantly as it cooks.
- Once the mixture is thick enough for the whisk to leave a visible trail, remove it from the stove and allow it to cool at room temperature.
- Put the contents in a bowl and store it within a sealed container in the refrigerator for about 20 minutes.
Gluten-Free Milk Bread Ingredients
- 3 cups of all-purpose, gluten-free flour (and extra for sprinkling onto a work surface).
- 1 1/2 teaspoons of xanthan gum.
- 1/4 teaspoon of cream of tartar.
- 1/4 cup of granulated sugar.
- 2 1/2 teaspoons of instant (or rapid-rise or bread maker) yeast.
- 1/2 teaspoon of kosher salt.
- 1 teaspoon of apple cider vinegar.
- 1 egg at room temperature.
- 1 1/4 cup of warm milk (make sure it is about 100 degrees Fahrenheit).
- 4 tablespoons of melted and cooled unsalted butter.
Gluten-Free Milk Bread Recipe
- Line a standard 9 x 5-inch loaf pan with greased parchment paper and set it aside.
- Mix your all-purpose gluten-free flour, xanthan gum, cream of tartar, granulated sugar, and instant yeast in a bowl under a stand mixer with a paddle attachment. If you need to, whisk the mixture with a separate handheld whisk to combine well.
- Whisk the kosher salt into the mixture, then add in the apple cider vinegar, egg, milk, melted butter, and starter, and mix on a low speed.
- Once the dry ingredients and wet ingredients have been thoroughly mixed together, turn the stand mixer up to a high setting and mix for about three more minutes.
- Turn the dough out onto a lightly floured work surface and divide it into three equal portions. Pat out these portions into flat discs – about 3/4-inch-thick each. Again, you should wrap each portion up in plastic wrap as you work, so the dough doesn’t dry out or form a skin in the meantime.
- Fold each disc loosely in half and then stack the folded pieces of dough – one behind the other – in the pan with the folded part facing up. These dough discs should fit snugly in the pan from one side to the next.
- Lightly spray your dough with warm water and then cover the whole thing in loose plastic wrap. Place the pan in a warm, draft-free location and leave it alone to rise up to 150% of its original volume.
- While you wait for your dough to rise, preheat your oven to 350 degrees Fahrenheit.
- If you want, you can lightly brush the dough with melted butter. After this, place the pan in the center of the oven. Bake for 45 minutes.
- Remove the bread from the loaf pan and transfer it to a rimmed baking sheet. Put this baking sheet back in the oven.
- Continue to bake until the loaf sounds hollow when you hit it from the side, or until it has an internal temperature of about 190° Fahrenheit. Make sure the crust is a light golden brown all over.
- Take the loaf out of the oven and then transfer it to a wire rack to cool entirely.
- Slice up and enjoy!
This video shows how to make Japanese milk bread in dinner rolls!
Conclusion
Though Japan isn’t necessarily known for their various breads, there is no denying Japanese milk bread is still quite the delicious treat!
This sweet creation has become a breakfast staple in Japan – and, now, you can make your own Japanese milk bread at home!
What’s your favourite Japanese milk bread recipe?